SSL Certificate Installation Steps: Server Guide 2026
By Nick Phillips, Founder
SSL Certificate Installation Steps: Server Guide 2026
TL;DR:
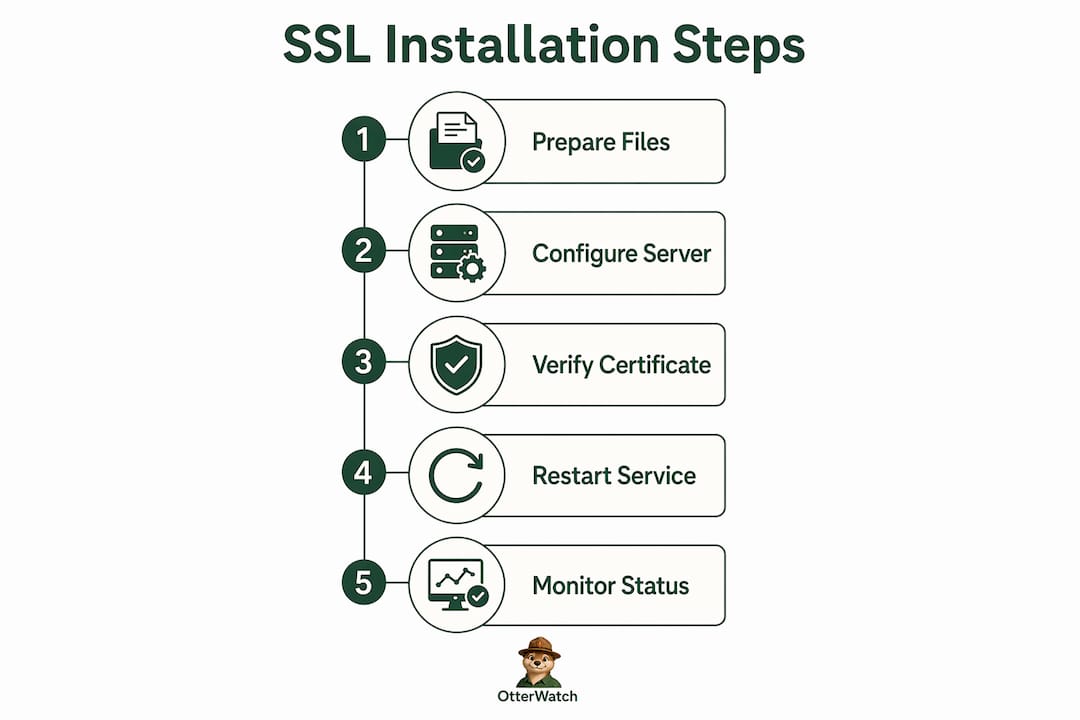
- Proper SSL certificate installation involves configuring your server with the complete chain, including your server cert, intermediate certificates, and private key, ensuring browsers trust your site. Verifying the chain with external tools like OpenSSL or online checkers is essential to prevent trust errors and browser warnings. Finally, binding the imported certificate to your web server or site completes the process, guaranteeing secure and trusted HTTPS connections.
SSL certificate installation is the process of configuring your web server to serve your website over HTTPS by placing the correct certificate files in the right locations and pointing your server software to them. Get it wrong and browsers throw “Your connection is not private” warnings that send visitors running. Get it right and you get a padlock, encrypted traffic, and a browser that trusts you completely. This guide walks you through the ssl certificate installation steps for Nginx, Apache, and IIS, covering prerequisites, exact commands, common pitfalls, and how to verify everything worked.
What you need before starting ssl certificate installation
Three files are non-negotiable before you touch a server config. You need your server certificate (the ".crtor.pem` file issued by your Certificate Authority), your private key (generated on your server when you created the CSR), and the intermediate certificate bundle from your CA. Commercial SSL installation requires generating a CSR and private key, submitting the CSR to a trusted CA for domain validation, then installing the issued server certificate plus the CA intermediate chain. Miss any one of those three files and the install will either fail outright or appear to succeed while browsers still reject it.

You also need the right server access. On Linux, that means SSH access with sudo privileges. On Windows, you need access to IIS Manager or the Microsoft Management Console (MMC). The table below maps out what you need by server type.
| Server | Access needed | Key files | Main tool |
|---|---|---|---|
| Nginx | SSH + sudo | server.crt, ca-bundle.crt, private.key | openssl, text editor |
| Apache | SSH + sudo | server.crt, ca-bundle.crt, private.key | openssl, a2enmod |
| IIS (Windows) | IIS Manager or MMC | .pfx or .cer + .p7b | IIS Manager, certlm.msc |
A few notes that trip people up before you start:
- Your private key never leaves your server. You generate it locally with
openssl genrsa, and it stays there. - If your CA sent you multiple
.crtfiles, one is your server cert and the others are intermediates. Keep them separate until the config step tells you to combine them. - On IIS, you typically need a
.pfxfile (which bundles the cert and private key together). If your CA sent.crtand.keyfiles, use OpenSSL to convert:openssl pkcs12 -export -out cert.pfx -inkey private.key -in server.crt -certfile ca-bundle.crt
Pro Tip: Store your private key with permissions set to 600 (chmod 600 private.key). If your web server process can read it but nothing else can, you have the right setup.
How to install an SSL certificate on Nginx and Apache
Nginx installation steps
Nginx requires the ssl_certificate directive to point to a chained certificate file containing your server certificate followed by the intermediate certificate(s). This is the single most common mistake on Nginx: pointing ssl_certificate at only the leaf cert and wondering why mobile browsers complain.
- Combine your server cert and intermediate bundle into one file:
cat server.crt ca-bundle.crt > chained.crt
- Copy your files to a secure location, typically
/etc/ssl/certs/for the chain and/etc/ssl/private/for the key. - Open your Nginx server block config (usually in
/etc/nginx/sites-available/) and add or update these directives:
server {
    listen 443 ssl;
    server_name yourdomain.com;

    ssl_certificate     /etc/ssl/certs/chained.crt;
    ssl_certificate_key /etc/ssl/private/private.key;

    ssl_protocols TLSv1.2 TLSv1.3;
    ssl_ciphers HIGH:!aNULL:!MD5;
}
- Test the config before restarting:
sudo nginx -t - If the test passes, reload:
sudo systemctl reload nginx
Nginx TLS configuration specifies typical file paths under /etc/letsencrypt/live for Let’s Encrypt certificates, so if you used Certbot, your paths will look like /etc/letsencrypt/live/yourdomain.com/fullchain.pem and privkey.pem. The fullchain.pem file is already the combined chain, so you skip the cat step entirely.
Pro Tip: After editing the config, run openssl s_client -connect yourdomain.com:443 -showcerts from your terminal. You should see at least two certificates in the output: your server cert and the intermediate. One cert means your chain is incomplete.
Apache installation steps
Apache’s ssl certificate configuration steps differ slightly depending on your version. Apache 2.4.8 and later allow you to append intermediates directly to SSLCertificateFile, which deprecates the older SSLCertificateChainFile directive. If you are on an older version, you still need that separate directive.
- Enable the SSL module if it is not already active:
sudo a2enmod ssl
sudo systemctl restart apache2
- Copy your cert files to
/etc/ssl/certs/and your key to/etc/ssl/private/. - For Apache 2.4.8+, combine your certs:
cat server.crt ca-bundle.crt > combined.crt
- Open your virtual host config and set these directives:
<VirtualHost *:443>
    ServerName yourdomain.com
    SSLEngine on
    SSLCertificateFile    /etc/ssl/certs/combined.crt
    SSLCertificateKeyFile /etc/ssl/private/private.key
</VirtualHost>
- For Apache versions before 2.4.8, keep the files separate and add:
SSLCertificateChainFile /etc/ssl/certs/ca-bundle.crt
- Test the config:
sudo apachectl configtest - Restart Apache:
sudo systemctl restart apache2
| Apache version | SSLCertificateFile contains | SSLCertificateChainFile needed? |
|---|---|---|
| Before 2.4.8 | Server cert only | Yes |
| 2.4.8 and later | Server cert + intermediates combined | No |
How to install and bind SSL certificates on Windows IIS
IIS handles SSL in two distinct phases, and skipping the second phase is the most common reason HTTPS fails on Windows servers. Importing the certificate into the local computer certificate store is only half the process. Binding it to the site on port 443 completes the installation. Many administrators import successfully and then wonder why the site still serves HTTP.
Phase 1: Import the certificate
- Open IIS Manager and select your server node in the left panel.
- Double-click Server Certificates in the center pane.
- In the right Actions panel, click Import.
- Browse to your
.pfxfile, enter the password you set when exporting it, and click OK. - The certificate now appears in the Server Certificates list.
Alternatively, use MMC: press Win + R, type certlm.msc, navigate to Personal > Certificates, right-click and choose All Tasks > Import, then follow the wizard.
Phase 2: Bind the certificate to your site
- In IIS Manager, expand Sites and select your website.
- In the right Actions panel, click Bindings.
- Click Add (or edit an existing HTTPS binding if one exists).
- Set Type to
https, Port to443, and select your certificate from the SSL certificate dropdown. - Click OK and close the Bindings dialog.
- Browse to
https://yourdomain.comto confirm the padlock appears.
Failing to bind SSL certificates to IIS websites after importing is a frequent cause of HTTPS failures despite a successful certificate import. Microsoft’s guidance treats binding as a required activation step, not an optional one.
Pro Tip: If the SSL certificate dropdown in the Bindings dialog is empty even after importing, the certificate was likely imported into the wrong store. It must be in the Personal store under Local Computer, not Current User.
- Verify the cert is in Local Computer > Personal > Certificates, not under your user account.
- Check that the
.pfxincluded the private key. A cert without a private key will import but will not appear in the IIS dropdown. - If you see the cert but HTTPS still fails, check that Windows Firewall allows inbound traffic on port 443.
Common SSL installation problems and how to fix them
Intermediate certificates are the leading reason installs seem successful on the server but fail in browsers. The trust chain runs Server Cert to Intermediate to Root. Browsers ship with root certificates built in, but they do not always have every intermediate. If your server does not send the intermediate, some browsers (especially on mobile) will reject the connection even though your cert is technically valid.
Common errors and their fixes:
- “Your connection is not private” (NET::ERR_CERT_AUTHORITY_INVALID): Almost always a missing or incomplete intermediate. Rebuild your chained cert file and reload the server.
- “SSL handshake failed”: Often a private key mismatch. Verify the key matches the cert with
openssl x509 -noout -modulus -in server.crt | md5sumandopenssl rsa -noout -modulus -in private.key | md5sum. The hashes must match. - Mixed content warnings: Your page loads over HTTPS but pulls in HTTP resources (images, scripts). Fix asset URLs in your CMS or code.
- Certificate name mismatch: The domain in the cert’s CN or SAN fields does not match the URL. Check your domain certificate mismatch and reissue if needed.
Use the GlobalSign SSL Configuration Checker or run
openssl s_client -connect yourdomain.com:443to verify chain completeness after every install. These tools catch issues that a simple browser check will miss, particularly on older Android devices that have stricter chain validation.
Most SSL chain problems arise from confusion between leaf certificates, full-chain certificates, and intermediate-only certificates. Using a full-chain file consistently in your Nginx config solves the majority of trust issues in one move. On Apache, the same principle applies: combine before you configure.
Pro Tip: After fixing a chain issue, clear your browser cache before retesting. Browsers aggressively cache TLS errors, and you may see a stale warning even after a correct fix.
Key takeaways
Correct SSL installation requires three files (server cert, intermediate bundle, and private key) configured in the right order for your specific server software.
| Point | Details |
|---|---|
| Chain file is non-negotiable | Nginx and Apache both need the intermediate cert bundled with the server cert for browser trust. |
| Apache version changes the config | Apache 2.4.8+ combines certs in SSLCertificateFile; older versions need SSLCertificateChainFile separately. |
| IIS requires two steps | Import the certificate into the Local Computer store, then bind it to port 443 in IIS Manager. |
| Verify after every install | Use OpenSSL or an online checker to confirm the full chain is served, not just the leaf cert. |
| Private key must match the cert | A modulus hash mismatch between key and cert causes handshake failures regardless of chain correctness. |
What I’ve learned from doing SSL installs the hard way
I have walked through SSL installations on servers running everything from bare-metal Nginx to shared Windows IIS environments, and the pattern that causes the most wasted time is always the same: people treat the install as done the moment the cert file is in place. It is not done until you have verified the chain from outside the server.
The Certbot workflow for Nginx has genuinely changed how I approach this on Linux. When you run certbot --nginx, it handles the chain file, the config directives, and the renewal cron job in one pass. For Let’s Encrypt certificates, I would not do it manually anymore. But for commercial certificates from DigiCert, Sectigo, or GlobalSign, you are still doing this by hand, and the intermediate bundle step is where most people slip up.
On IIS, the binding step catches people every single time. I have seen experienced sysadmins spend an hour troubleshooting HTTPS failures only to realize the cert was sitting in the certificate store, fully imported, with no binding attached. The SSL installation for small sites guide covers this in more detail, but the short version is: always check bindings first before you go digging into firewall rules or cert validity.
One thing I push hard on is monitoring after installation. A cert that is correctly installed today will expire in 90 days (for Let’s Encrypt) or one to two years (for commercial certs). If you do not have something watching it, you will find out it expired when a visitor tells you. That is not a great way to run a site.
— Nick Phillips
Verify your install and keep watching it with Otterwatch
Once your SSL certificate is in place, the next step is making sure it actually works and stays working. Otterwatch’s free SSL checker lets you paste in your domain and instantly see whether your certificate chain is complete, your cert is trusted, and your expiry date gives you enough runway.
Beyond the one-time check, Otterwatch monitors your SSL certificates and uptime continuously, sending you a calm heads-up well before anything expires or goes down. No dashboards to babysit, no alarm-language alerts. Otis the otter just sends you a plain note when something needs attention. You can monitor up to five sites for free, which covers most small site owners and solo administrators completely. Installation is the start. Monitoring is what keeps it working.
FAQ
What files do I need to install an SSL certificate?
You need three files: your server certificate issued by the CA, the intermediate certificate bundle, and the private key generated on your server during CSR creation. Missing the intermediate bundle causes browser trust failures even when the server cert is valid.
How do I install an SSL certificate on Nginx?
Concatenate your server cert and intermediate bundle into a single chained file, then point the ssl_certificate directive at that file and ssl_certificate_key at your private key. Reload Nginx with sudo systemctl reload nginx and verify the chain with openssl s_client.
Why does HTTPS still fail after importing a certificate in IIS?
Importing the cert into the certificate store is only the first step. You must also create an HTTPS binding in IIS Manager, selecting port 443 and your certificate, before HTTPS activates on the site.
What causes “Your connection is not private” after installation?
This error almost always means the intermediate certificate is missing from the chain your server sends to browsers. Rebuild your chained cert file to include both the server cert and the CA intermediate, then reload your server.
How do I check if my SSL certificate is installed correctly?
Run openssl s_client -connect yourdomain.com:443 -showcerts from a terminal or use an online tool like the GlobalSign SSL checker. You should see the full chain including at least one intermediate certificate in the output.
Recommended
- SSL Certificate Installation Explained for Small Sites · Otterwatch
- SSL Certificate MCP Server — Otterwatch
- Blog · Otterwatch
- Domain Certificate Mismatch Causes: 2026 Fix Guide · Otterwatch
Catch the next cert expiry before your users do.
Otterwatch checks your SSL certificates daily and emails you 30 days before they expire. Five sites free.
Start watching →