SSL Certificate Installation Explained for Small Sites
By Nick Phillips, Founder

SSL certificate installation is the process of deploying certificate files on a web server to activate HTTPS encryption and establish browser trust for your website. Without a properly installed certificate, browsers display “Not Secure” warnings that drive visitors away and undermine your credibility. The good news: whether you use cPanel AutoSSL, Let’s Encrypt with Certbot, or a manual setup on Apache or Nginx, the certificate installation process follows a predictable pattern once you understand the moving parts. This guide walks you through every stage, from the files you need to the server config that makes it all work.
Certificate installation explained: what it actually does
Certificate installation is the act of placing three specific files on your server and telling your web server software where to find them. When a visitor’s browser connects to your site, it performs a TLS handshake, checking that your certificate is valid, signed by a trusted authority, and matches your domain. If any part of that chain is broken, the browser throws a warning and the visitor bounces. The installation process is what builds that chain correctly in the first place.
The industry standard term for what most people call “SSL” is actually TLS (Transport Layer Security). SSL is the older protocol, but the name stuck. When you see “SSL certificate” in your hosting panel, it means a TLS certificate. Both terms refer to the same thing in practice, and you will see them used interchangeably throughout hosting documentation.
What certificate components are required for installation?
Getting the files right before you start saves a lot of frustration. Successful installation requires three inputs: the server certificate, a matching private key, and the intermediate CA chain. Each one plays a distinct role.
Here is what each file does and why it matters:
-
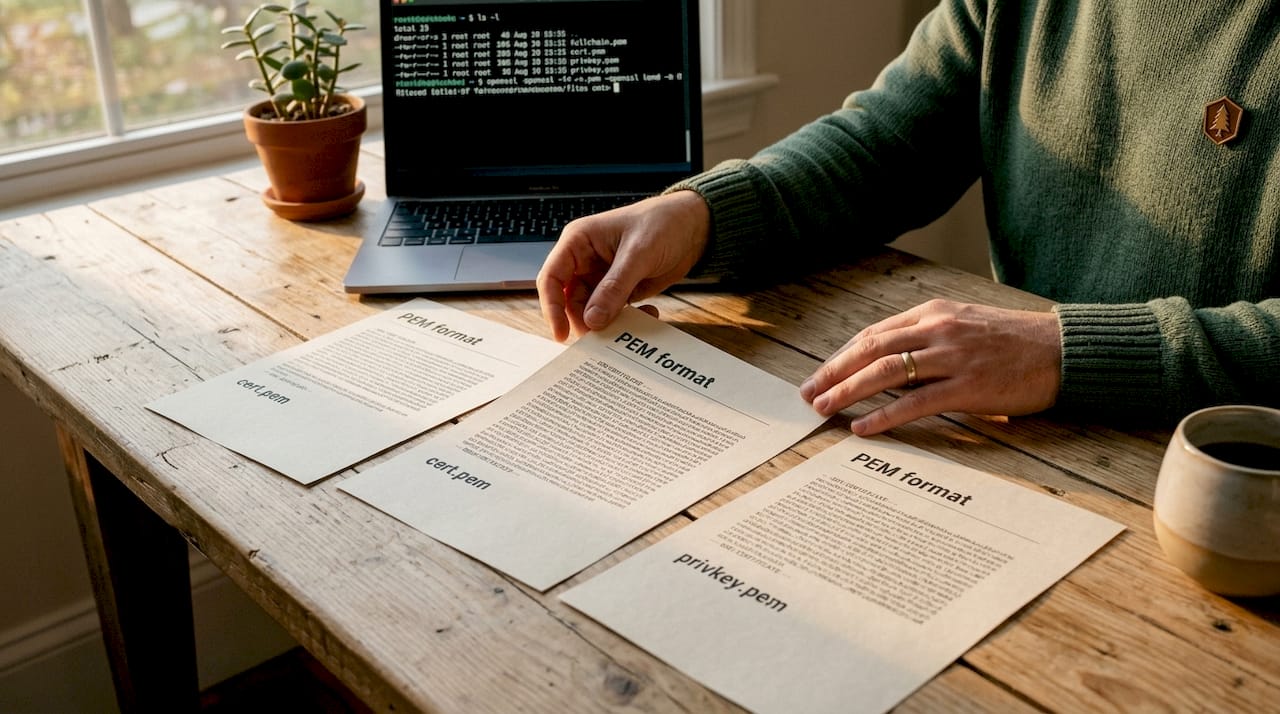
Server certificate (CRT or PEM file): This is the leaf certificate issued to your domain by the Certificate Authority (CA). It contains your domain name, the CA’s signature, and an expiration date. It is the file your server presents to browsers during the handshake.
-
Private key (KEY file, unencrypted): The private key is generated on your server when you create a Certificate Signing Request (CSR). It must match the certificate exactly. Encrypted private keys are rejected by many hosting panels and server configurations, so always export it in unencrypted format before installation.
-
Intermediate CA bundle (CA bundle or chain file): This is the file most people forget, and it is the one that causes the most problems. Browsers verify trust chains from your leaf certificate through intermediate certificates up to a trusted root stored in the operating system. If the intermediate chain is missing, browsers cannot complete that verification and display a trust warning, even if your leaf certificate is perfectly valid.
All three files should be in PEM format, which is plain text and starts with "-----BEGIN CERTIFICATE-----`. If you receive files in DER format (binary), use OpenSSL to convert them before uploading. The private key is the source of truth for the whole installation. Treat it carefully, keep it off public directories, and never share it.
How do automated SSL installations like AutoSSL and Let’s Encrypt work?
For most individuals and small business owners, automated installation is the right starting point. It removes the manual steps, handles renewals without reminders, and works well with standard shared hosting or VPS setups.
-
cPanel AutoSSL: AutoSSL automates certificate issuance and renewal without manual intervention. cPanel periodically checks your domains, requests new certificates when they are missing or approaching expiry, validates domain ownership, and installs certificates automatically on a 60 to 90 day cycle. You log into cPanel, navigate to SSL/TLS Status, and click “Run AutoSSL.” After that, the system handles everything. This is the fastest path for anyone on shared hosting.
-
Let’s Encrypt with Certbot: Let’s Encrypt provides free, automated certificates that renew automatically, which significantly reduces the operational risk of an expired certificate catching you off guard. On a Linux VPS, you install Certbot, run
sudo certbot --apacheorsudo certbot --nginxdepending on your server, and Certbot handles the CSR generation, domain validation, certificate download, server configuration, and renewal scheduling in one pass. -
Hosting panel integrations: Many hosts, including SiteGround, Kinsta, and WP Engine, have built Let’s Encrypt issuance directly into their dashboards. You click one button, the certificate installs, and a cron job handles renewals. Zero manual intervention required.
-
Wildcard and multi-domain automation: Certbot supports wildcard certificates via DNS challenge (
certbot certonly --manual --preferred-challenges dns). This requires adding a TXT record to your DNS, but once set up, it covers all subdomains automatically. -
Renewal automation check: After setting up Certbot, confirm the renewal timer is active with
systemctl status certbot.timeron systemd systems. A missed renewal is the most common cause of unexpected certificate expiry.
Pro Tip: Run certbot renew --dry-run after initial setup to confirm the renewal process will work without actually replacing the certificate. This catches permission errors and configuration issues before they become real problems.
cPanel’s AutoSSL implementation is particularly effective for small business owners because it requires minimal technical input while maintaining reliable certificate coverage across all hosted domains.
What are the steps for manual SSL certificate installation?
Manual installation applies when you have a paid certificate from a CA like DigiCert, Sectigo, or GlobalSign, or when you need full control over the configuration. Here is the process for Apache and Nginx.
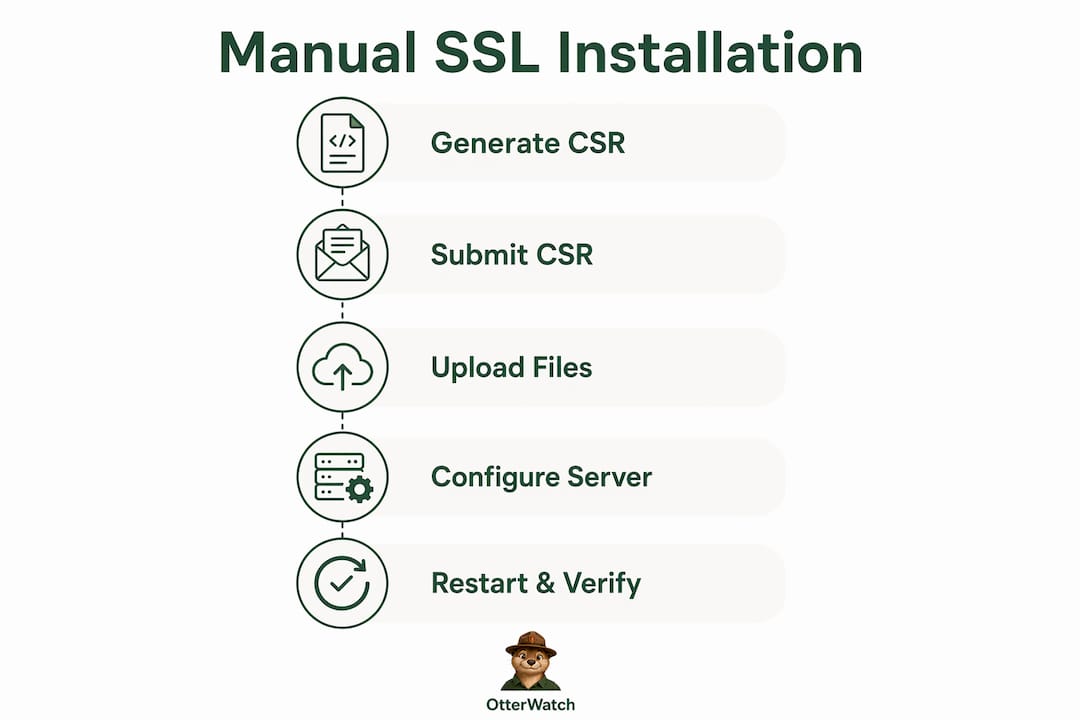
Step 1: Generate a CSR and private key
On your server, run:
openssl req -new -newkey rsa:2048 -nodes -keyout yourdomain.key -out yourdomain.csr
This creates your private key (yourdomain.key) and the CSR you submit to the CA. The -nodes flag means no passphrase, which keeps the key unencrypted and ready for server use.
Step 2: Submit the CSR and receive your certificate files
Paste the CSR into your CA’s portal. After validation, you receive the leaf certificate and the intermediate CA bundle. Download both.
Step 3: Upload files to your server
Copy the certificate, private key, and chain to a secure directory, typically /etc/ssl/certs/ for certificates and /etc/ssl/private/ for the key. Set permissions: chmod 600 on the private key.
Step 4: Configure your web server
Here is where Apache and Nginx diverge:
| Directive | Apache | Nginx |
|---|---|---|
| Certificate file | SSLCertificateFile /path/to/cert.pem |
ssl_certificate /path/to/fullchain.pem |
| Private key | SSLCertificateKeyFile /path/to/privkey.pem |
ssl_certificate_key /path/to/privkey.pem |
| Chain file | SSLCertificateChainFile /path/to/chain.pem |
Included in fullchain.pem |
Apache configurations commonly use SSLCertificateChainFile for the intermediate bundle, or a combined fullchain.pem in SSLCertificateFile with newer Apache versions. Nginx requires fullchain.pem in ssl_certificate, which combines the leaf certificate and intermediates. Using only cert.pem on Nginx causes browser trust errors because the chain is incomplete.
Step 5: Restart and verify
Restart Apache with sudo systemctl restart apache2 or Nginx with sudo systemctl restart nginx. Then run:
openssl s_client -connect yourdomain.com:443 -showcerts
Look for “Verify return code: 0 (ok)” in the output. That confirms the chain is complete and trusted.
Pro Tip: If the restart fails, check the error log immediately with sudo journalctl -u nginx or sudo tail -f /var/log/apache2/error.log. Nine times out of ten, the error points directly to a misconfigured file path or a key that does not match the certificate.
How to manage and troubleshoot certificate installation issues
Getting the certificate installed is step one. Keeping it working is the ongoing job.
-
Automate renewals without exception. Let’s Encrypt certificates are valid for 90 days by design, which forces regular renewal and reduces the window of exposure if a key is compromised. Manual renewals on 90-day cycles are not realistic for a busy site owner, so automation is not optional.
-
Force HTTPS after installation. Forcing HTTPS redirects is critical to protecting all visitor traffic and preventing mixed-content warnings. In cPanel, use the “Force HTTPS Redirect” toggle. On Apache, add a redirect rule in
.htaccess. On WordPress, update the site URL in Settings tohttps://. -
Check for domain mismatches. The most common trust error after installation is a domain mismatch, where the certificate covers
www.yourdomain.combut the server is servingyourdomain.comwithout a redirect. Check your Subject Alternative Names (SAN) fields to confirm all variants are covered. -
Test with an online SSL checker. Tools like SSL Labs’ SSL Test (ssllabs.com/ssltest) give you a full report on chain completeness, protocol support, and cipher strength. Run this after every installation or renewal.
-
Watch for missing intermediates. DigiCert explicitly recommends installing intermediate CA certificates in your server config to build a full trust path rather than relying on default system behavior. Some older Android devices and browsers do not perform AIA fetching, so they cannot retrieve missing intermediates on their own.
Pro Tip: Test your site on a mobile device with a fresh browser session after installation. Desktop browsers cache certificate data aggressively, so they may show a green padlock even when the chain has a problem that mobile devices catch immediately.
Key takeaways
Correct SSL certificate installation requires three files, proper server configuration, and automated renewal to maintain uninterrupted HTTPS trust.
| Point | Details |
|---|---|
| Three files required | You need the server certificate, an unencrypted private key, and the intermediate CA chain for every installation. |
| Chain errors are the top cause of warnings | Missing intermediate certificates break browser trust even when the leaf certificate is valid. |
| Automation beats manual renewal | AutoSSL and Let’s Encrypt with Certbot eliminate the risk of forgotten renewals and expiry-related downtime. |
| Nginx needs fullchain.pem | Using only cert.pem on Nginx omits intermediates and causes trust errors on many browsers and devices. |
| Force HTTPS after installing | Redirecting all HTTP traffic to HTTPS prevents mixed-content warnings and protects every visitor session. |
What I’ve learned from watching certificates expire on good sites
I have seen well-run small business sites go dark because a paid certificate expired on a Tuesday afternoon and nobody noticed until customers started calling. The certificate was installed correctly. The problem was that nobody was watching it after the fact.
The part of the SSL certificate setup guide that most tutorials skip is the monitoring step. Installation is a one-time event. Expiry is a recurring threat. Let’s Encrypt’s 90-day cycle is actually a feature, not a limitation, because it forces you to build automation early. But paid certificates from DigiCert or Sectigo often run for one or two years, and that long runway creates a false sense of security. You set it up, it works, and then 13 months later it quietly expires at 3 a.m.
The other thing that trips people up more than any config error is the intermediate certificate. I have reviewed installations where the leaf cert was perfect, the private key matched, and the server was running fine. But on certain Android phones and older Windows machines, the site threw a trust warning. The culprit every single time was a missing or out-of-order intermediate chain. Test on real devices, not just Chrome on your laptop.
My honest recommendation: use automation wherever you can, verify the chain with openssl s_client after every install, and set up an external monitor that checks your certificate from outside your own network. You want something watching that will tell you before your visitors find out.
— Otis
Keep an eye on your certificates after installation
Installing your certificate correctly is the hard part. Keeping track of it after that should not be. Otterwatch watches your SSL certificates and sends you a plain, friendly heads-up well before they expire, so you are never caught off guard by a lapsed certificate. It also quietly checks that your sites are up at the same time, which means you get two layers of protection from one calm tool. No dashboards to dig through, no alarm language, just a simple alert when something needs your attention. Start monitoring free with up to five sites at no cost, and let Otterwatch handle the watching while you handle everything else.
FAQ
What is certificate installation?
Certificate installation is the process of deploying an SSL/TLS certificate onto a web server to enable HTTPS encryption. It involves placing the server certificate, private key, and intermediate CA chain on the server and configuring the web server software to use them.
Why do I get a browser warning after installing my certificate?
The most common cause is a missing intermediate certificate chain. Browsers verify trust from your leaf certificate through intermediates to a trusted root, and if any link is absent, the browser displays a warning even if the leaf certificate itself is valid.
How often do SSL certificates need to be renewed?
Let’s Encrypt certificates are valid for 90 days and should be set to renew automatically via Certbot or your hosting panel. Paid certificates from CAs like DigiCert or Sectigo typically run for one to two years but still require active renewal tracking.
What is the difference between cert.pem and fullchain.pem?
cert.pem contains only the leaf certificate for your domain. fullchain.pem combines the leaf certificate and all intermediate certificates into one file. Nginx requires fullchain.pem in ssl_certificate to avoid chain errors, while Apache can handle them separately using SSLCertificateChainFile.
Do I need to force HTTPS after installing my certificate?
Yes. Installing a certificate enables HTTPS but does not automatically redirect HTTP traffic. Forcing HTTPS redirects via cPanel, .htaccess, or your CMS settings is required to protect all visitor sessions and prevent mixed-content warnings.
Recommended
Catch the next cert expiry before your users do.
Otterwatch checks your SSL certificates daily and emails you 30 days before they expire. Five sites free.
Start watching →